eraserheadstudio
Jan joined
A forty year old Swedish developer trying to fulfill a childhood dream - creating his own game.
My Blogs
Due to low interest this devlog will take a break.
The devlog might return when it has reached a much more mature level, until then it can be followed on GameDev, TigForums and on the project site Eraserheadstudio.com
Thank you all!
Hello friends and a happy new year to all of you!
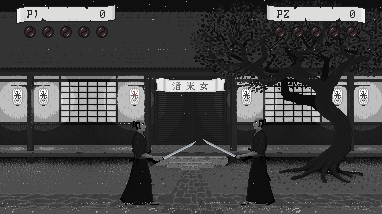
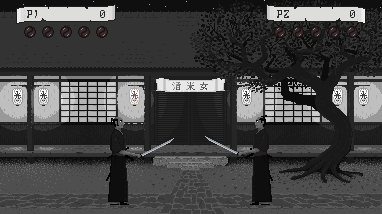
In my September post I stated the goal for the year to be the release of a first public build of 13 Ronin. I followed this statement with a list of features the release should contain, although I haven’t managed to complete all of those features I’m still happy to have something to release.
Lacking from the list is a background animation of a pair of women drinking tea, the color of the opponent (it should be white, but is grey) and an idle animation variation. The idle variation and the color of the opponent will be added later on. The tea-drinking women will probably be cut in favor of some other animation.
Big disclaimer
Please keep in mind that this is not a completed game, it's not even a demo, it's work in progress and a lot of stuff will be changed, improved and added before even this first level is finished. With all that said, you're very welcome to download it and give it a go, and hopefully give me some valuable feedback. This release is Windows only.
- Click this link to go to my DropBox-account
- Download file 13Ronin, 1st Public Build.zip
- When download is finished extract the zip-folder’
- Open folder and double-click 13Ronin.exe
- Press ‘1’ to start game
When playing, press ‘ESC’ to return to start-screen, and press 'ESC' once more to exit game.
Controls
Keyboard:
Moves:
Crouch - Arrow key down
Jump up - Ctrl key
Jump forward - Ctrl key + arrow key forward
Jump backward - Ctrl key + arrow key backward
Turn around - Space + Arrow key backward
Walk forward - Arrow key forward
Walk backward - Arrow key backward
Attacks:
Head cut - Space + Arrow key up
Kick - Space + Arrow key forward and down
Throat cut - Space + Arrow key forward
Throw gravel - Space + Arrow key down
Blocks:
Block Head cut - Shift + Arrow key up
Block Throat cut - Shift + Arrow key forward
X-box style gamepad:
Moves:
Crouch Directional pad down
Jump up Button X
Jump forward Button X + Directional pad forward
Jump backward Button X + Directional pad backward
Turn around Button B + Directional pad backward
Walk forward Directional pad forward
Walk backward Directional pad backward
Attacks:
Head cut - Button B + Directional pad up
Kick - Button B + Directional pad forward and directional pad down
Throat cut - Button B + Directional pad forward
Throw gravel - Button B + Directional pad down
Blocks:
Block Head cut - Button A + Directional pad up
Block Throat cut - Button A + Directional pad forward
This release is heavily flawed with an unintelligent opponent and unbalanced gameplay, but still, it’s a game that can be played, isn’t that something?
Happy new year!
/jan.
![]()
Since I had no previous experience of coding a computer player I turned to our friend google for advice. I found a number of threads on the subject, some talked about AI, but most of them talked about reaction based solutions, but since I’m not interested in AI and rather want to mimic the feeling found in old-school fighting games I decided to go for the reaction based solution. And when I use the phrase “reaction based”, I’m referring to an implementation that selects action-based on one or several conditions e.g. if the opponent hit then block.
Feeling a bit over-confident, I stopped reading and headed over to Visual Studio just to realize that this was not as easy as I had thought. Soon I had a bunch of if-statement and a code hard to follow. I refactored the code, but still I wasn’t pleased
Along came Halloween and at my workplace, we had an amazing party (I was dressed as the Invisible Man). After dinner, I chatted with a colleague, and talking about the computer player he asked if I was using a decision-tree for action selection. Decision trees? What’s this, yet another gap of knowledge.
The name itself told me that this was something I had to read up on. So, the day after, still recovering from the party, I started reading. And oh yes, this was what I’ve been looking for. (Thanks Mikael for the suggestion)
Decision trees
The full definition is somewhat longer, but simplified, a decision tree is a tree structure describing conditions and results. Every node is a condition deciding upon which branch to follow until reaching the leaf and the result of the path taken. This was exactly the kind of data structure I needed to find a structure around the computer player logic Using a fluent builder I could put all conditions in a tree and let the leaves contain what actions to perform.
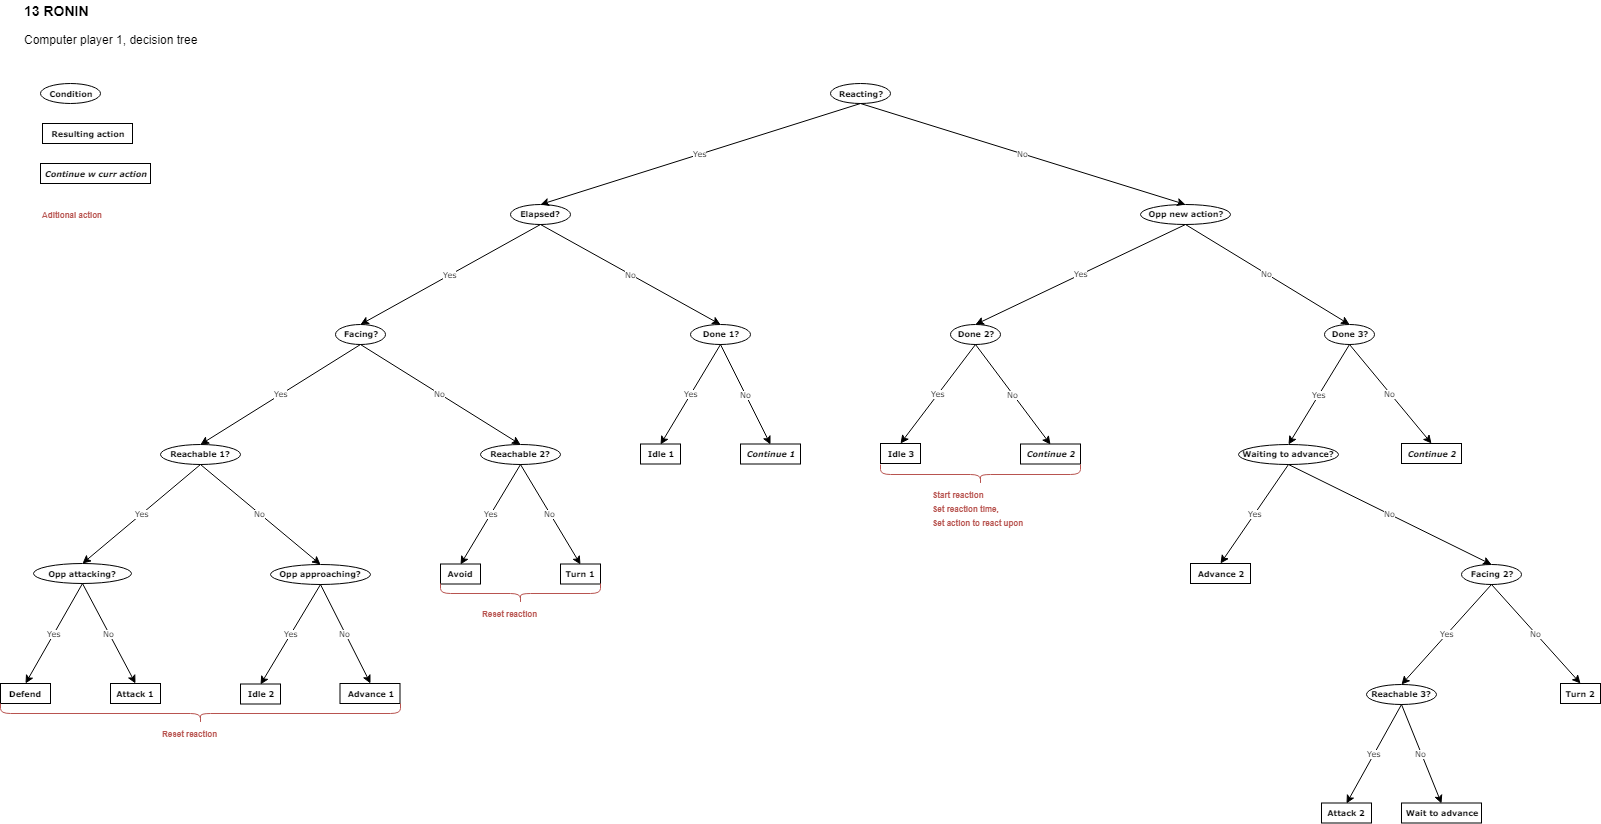
Decision tree for the computer player.
DecisionTreeNode
My implementation of the decision tree is very basic, it consists of a DecisionTreeNode-class that I use for the tree as well as for the nodes and the leaves.
The Condition-property is only applicable to condition nodes. It’s a delegate that when called will evaluate what child node to step into. It returns the name of the child to step into.
The Result-property is only applicable to leaves. It’s a delegate with actions associated to the leaf.
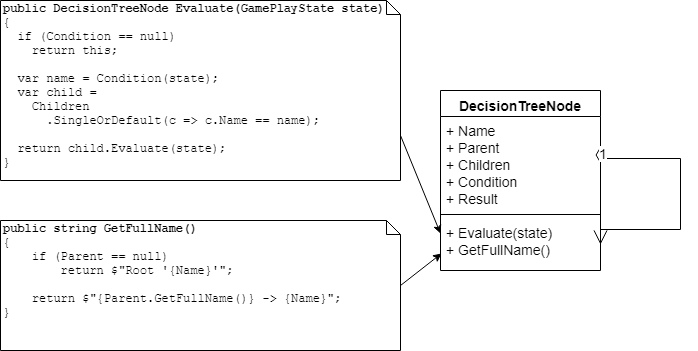
The GamePlayState-class contains all data needed when deciding computer action.
DecisionTreeBuilder
I’m quite fond of fluent coding so when building the DecisionTreeBuilder it was a natural pattern to choose. Using this pattern makes classes easy to use and code easy to read.
This is how I build the decision tree
var decisionTree =
	DecisionTreeBuilder
		.Begin(
			"Reacting",
			state =>
				state.Player.IsReacting()
					? "Elapsed"
					: "Opp new action")
		.AddNode(
			"Elapsed",
			state =>
				state.Player.IsTimeToReact(state.GameTime.TotalGameTime)
					? "Facing"
					: "Done 1")
		.AddNode(
			"Facing",
			state =>
			{
				return
					state.Player.IsFacingOpponent()
						? "Reachable 1"
						: "Reachable 2";
			})
		.AddNode(
			"Reachable 1",
			state =>
				state.Player.IsWithinReach(state.Opponent)
					? "Opp attacking"
					: "Opp approaching")
		.AddNode(
			"Opp attacking",
			state =>
				state.Player.ActionToReactUpon is AttackAction
					? "Defend"
					: "Attack 1")
		.AddLeaf(
			"Defend",
			state =>
			{
				state.Player.ResetReaction();
				state.Player.ParryHeadCut();
			})
		.AddLeaf(
			"Attack 1",
			state =>
			{
				state.Player.ResetReaction();
				state.Player.HeadCut();
			})
		.Parent()
		.AddNode(
			"Opp approaching",
			state =>
				state.Opponent.IsAdvancing() &&
				state.Opponent.IsFacingOpponent()
					? "Idle 1"
					: "Advance 1")
		.
		.
		.
		.Build();
AddNode will create and append a new node to the current nodes’ children and then go into the newly created node and make it current. AddLeaf will create and append a new leaf, but not go into it. Parent will go to the parent node and make it current. Build will return the newly composed tree.
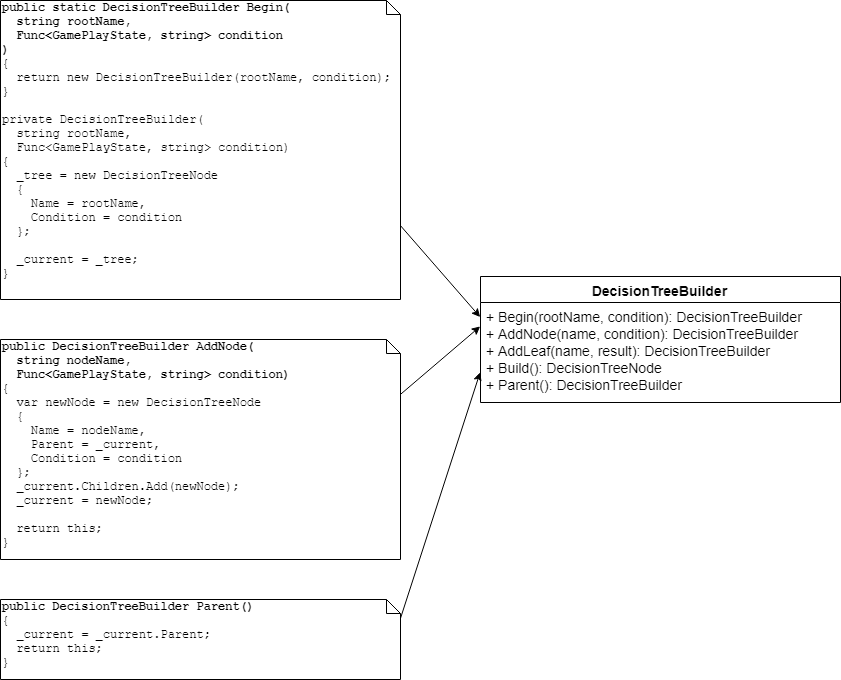
The choice to use strings for names makes it easy to follow the code but also makes it easy switching between the diagram and the code. The Parent-, and Name-properties together with the GetFullName method make nice tools while debugging.
Player
In my game I have a HumanPlayer-class and a ComputerPlayer-class, both implementing an abstract class Player. The main difference between the Human- and the ComputerPlayer-class is how the Update-method is implemented. The HumanPlayer-class is using input from keyboard and gamepad to control the player character while the ComputerPlayer is using the decision tree.

The code for using the tree looks like this:
	var leaf = _decisionTree.Evaluate(state);
	leaf.Action(state);
Nice, isn’t it?
Happy coding!
jan.
![]()
In my last blog post I showcased some of the audio I’ve been working with for my upcoming game 13 RONIN, now it’s time for graphics. But first a celebration. The 4th of October is a day dedicated to the cinnamon roll here in Sweden (yes, it’s true), which we, of course, celebrate by baking, buying and eating lot’s of (you guessed it) cinnamon rolls. Since I’m a fan of the pastry myself, I happily took part in the celebration.
But I also had another reason to celebrate. From October and till the end of the year I’ve reduced the number of hours I’m putting in on my day job from 40 to 32 in favor of spending more time working on 13 RONIN. Big kudos to my boss for approving this!
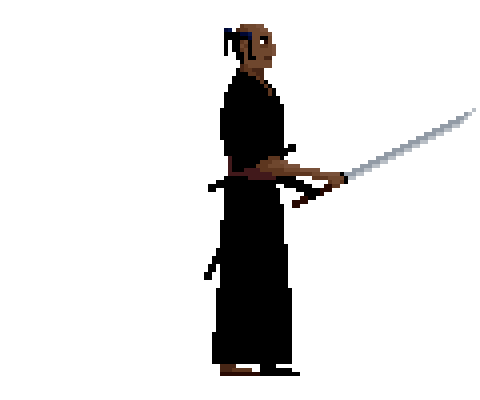
Main character
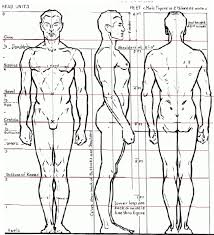
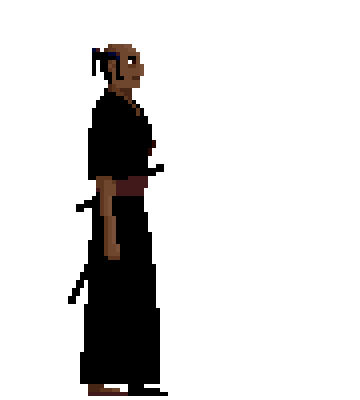
How do you go about drawing a samurai with realistic proportions when you don’t know how to draw?
I started by googling images on human proportions and created a reference image I could use as background layer while drawing.
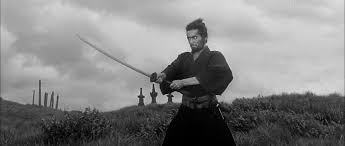
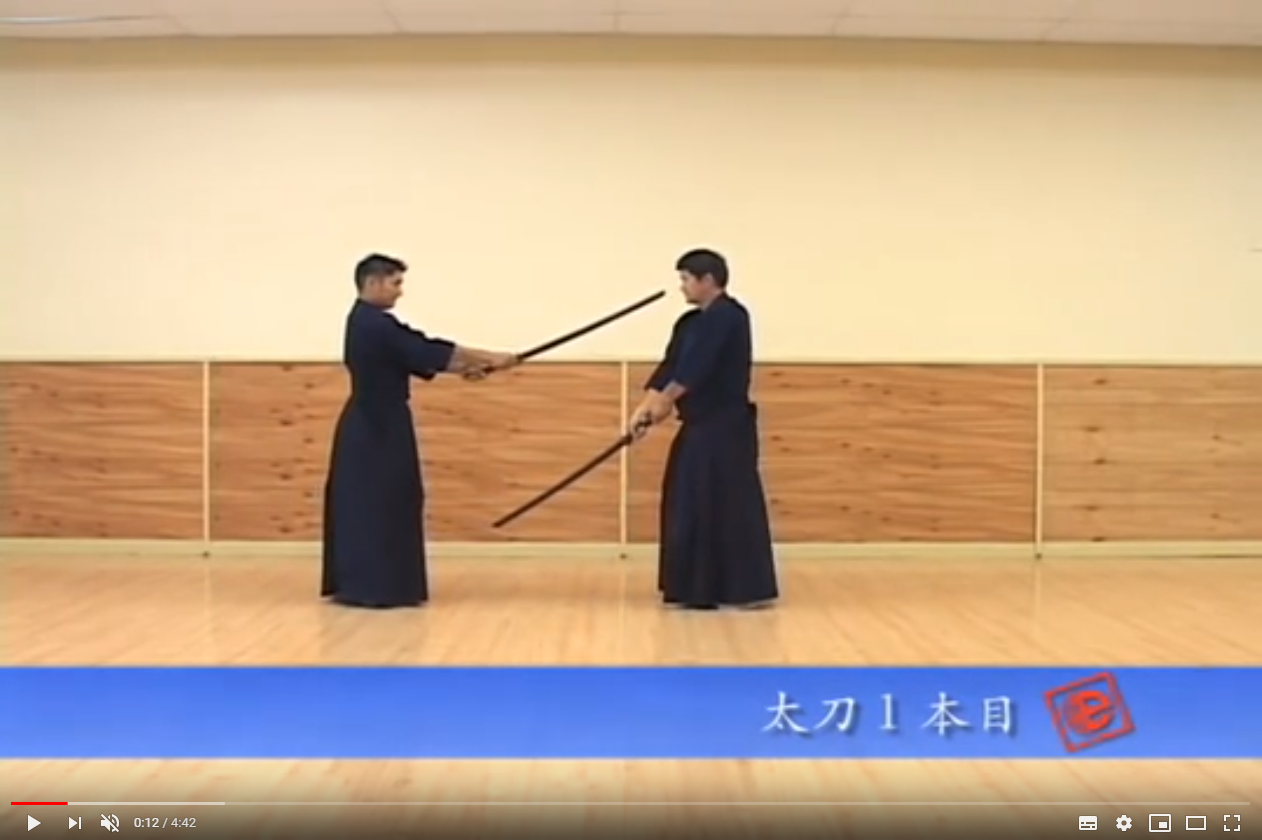
In parallel to this, I watched a lot of old samurai movies and Kendo-tournaments and with still images from these kind of videos as reference I drew my character.
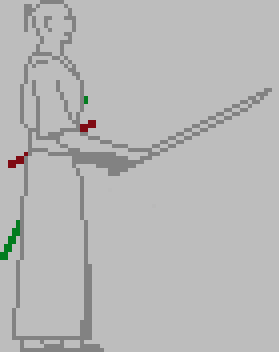
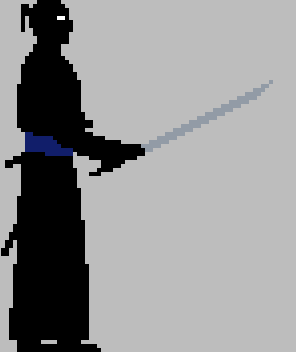
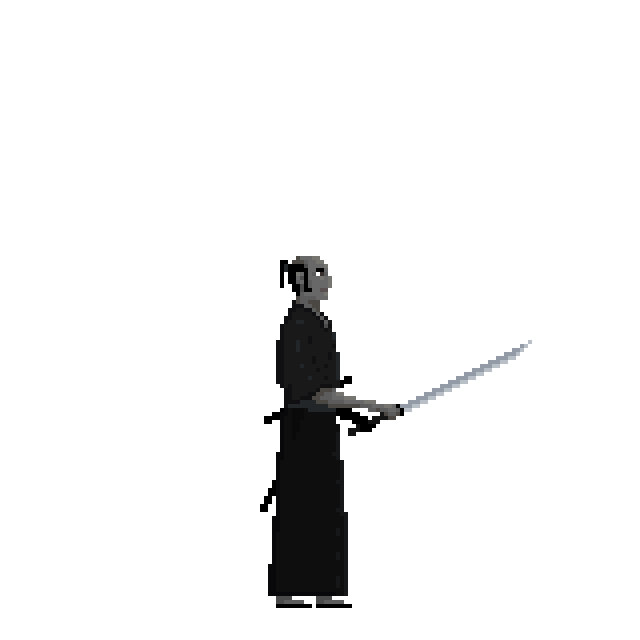
At the beginning of this project, I intended to use silhouette-looking sprites mostly drawn in solid black. This changed over time, I had a few different ideas, but finally settled on using gray-scaled sprites with very low-saturated colors for light and dark areas.
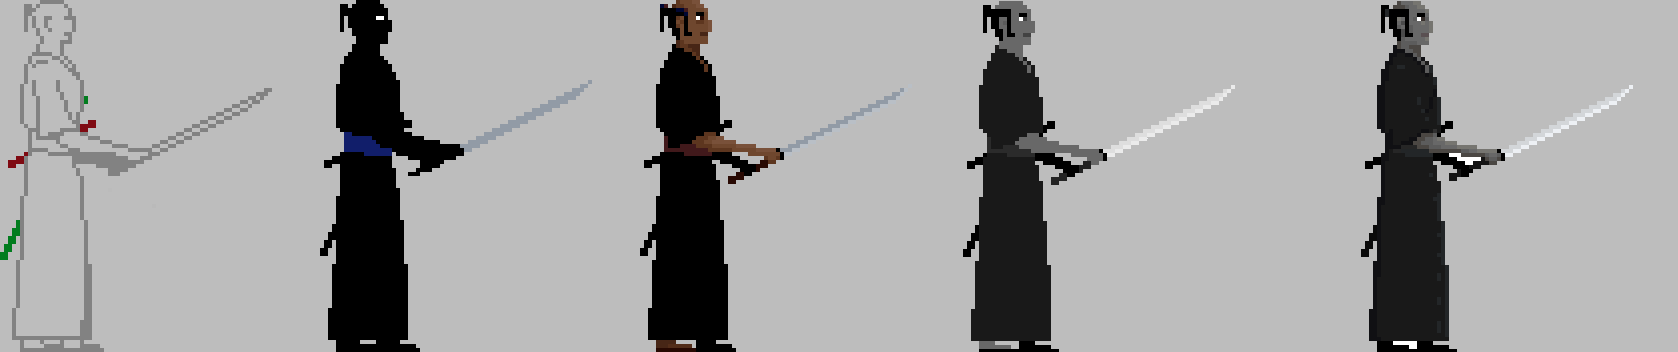
I decided on this color scheme to keep consistent with the black and white samurai movie theme. The low saturated colors are there to make the sprites stand out from the background, but also to make the visuals more interesting. With this style, I’ve found a reasonable balance between aesthetics and time spent drawing.
Background
In the early days of this project, I was more into ninjas than samurais and the initial idea for the game was that you as a white dressed samurai had to fight a bunch of bad, bad ninjas dressed in colorful outfits. To get started I drew a forest background.
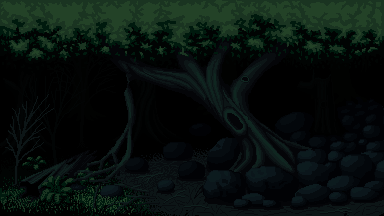
Soon I discovered that even the best of the ninja-movies weren’t that good and I found myself switching to samurai-movies and my approach to the project changed. Now I wanted to create a fighting game looking like Limbo, with black ninjas emerging from the dark. Some time later I re-discovered my love for low-resolution pixel-art and the Limbo-aesthetics was dropped. The code-project still carries the somewhat humorous working title of the ninja-project, it’s called “Ninja in the dark”.
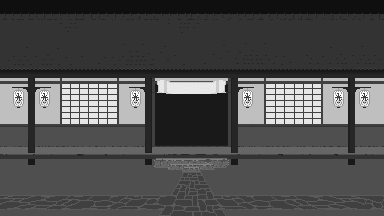
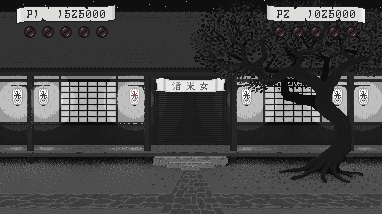
I wanted to start drawing something basic, something I thought I had the skills for and choose to draw a building which I later on turned into a tavern.It’s yet not finished and I can’t promise it will fit into the final game, but it will be the background of the first public build.
Energy and score
After finishing the background I took some time to draw the graphics for player score and energy symbols. I tried a few different ideas and settled on the score written in a custom font upon a scroll-like background.
For energy symbols I also tried a few different ideas before stealing the yin-yang symbols from The way of the exploding fist and turning them red. I do love that game.
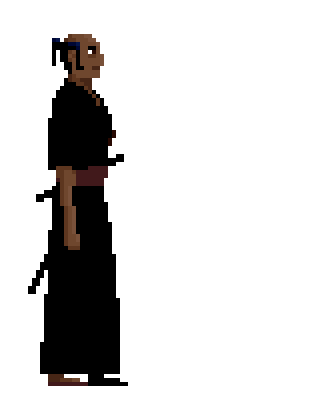
In-game graphics
There are a lot of animations to finish before the game is playable, but this is at least a taste of what will come.
Happy coding!
/jan.
![]()
It's been a long hot summer with wildfires crossing our country. We Swedes have a tendency to complain about the weather, mostly we think it's too cold, but after this summer I think most of us welcome fall and the cooler air.
During the summer I've been working on a little bit of everything but mostly I've been focusing on sound. But before I go into that topic I'd like to present the milestone I'm currently working towards.
First public build
Before Christmas I like to release my first public developer build including:
- One player mode.
- One level, the tavern, featuring:
- Windy rain.
- People drinking inside the tavern.
- Flies buzzing around a lantern.
- An opponent dressed in white.
- Move forward, backward, turn, dodge, turn dodging, jump, front- and backflip.
- Four different attacks and ways to parry them.
- One death sequence.
- Blood splatter.
- One idle animation variation.
- One MIDI song arranged with classical instruments.
- Sound effects, only normalized, not processed in any other way.
- HUD including score and energy.
- Camera shake.
This might not look like much, but for a one-man team, only working weekends and evenings it might even be too much.
Sound
If you've read my earlier posts you know I ordered an Arturia keyboard that happened to be broken on delivery. This caused a lot of annoyance and delayed my music production but now I've finally got all my gear set up.
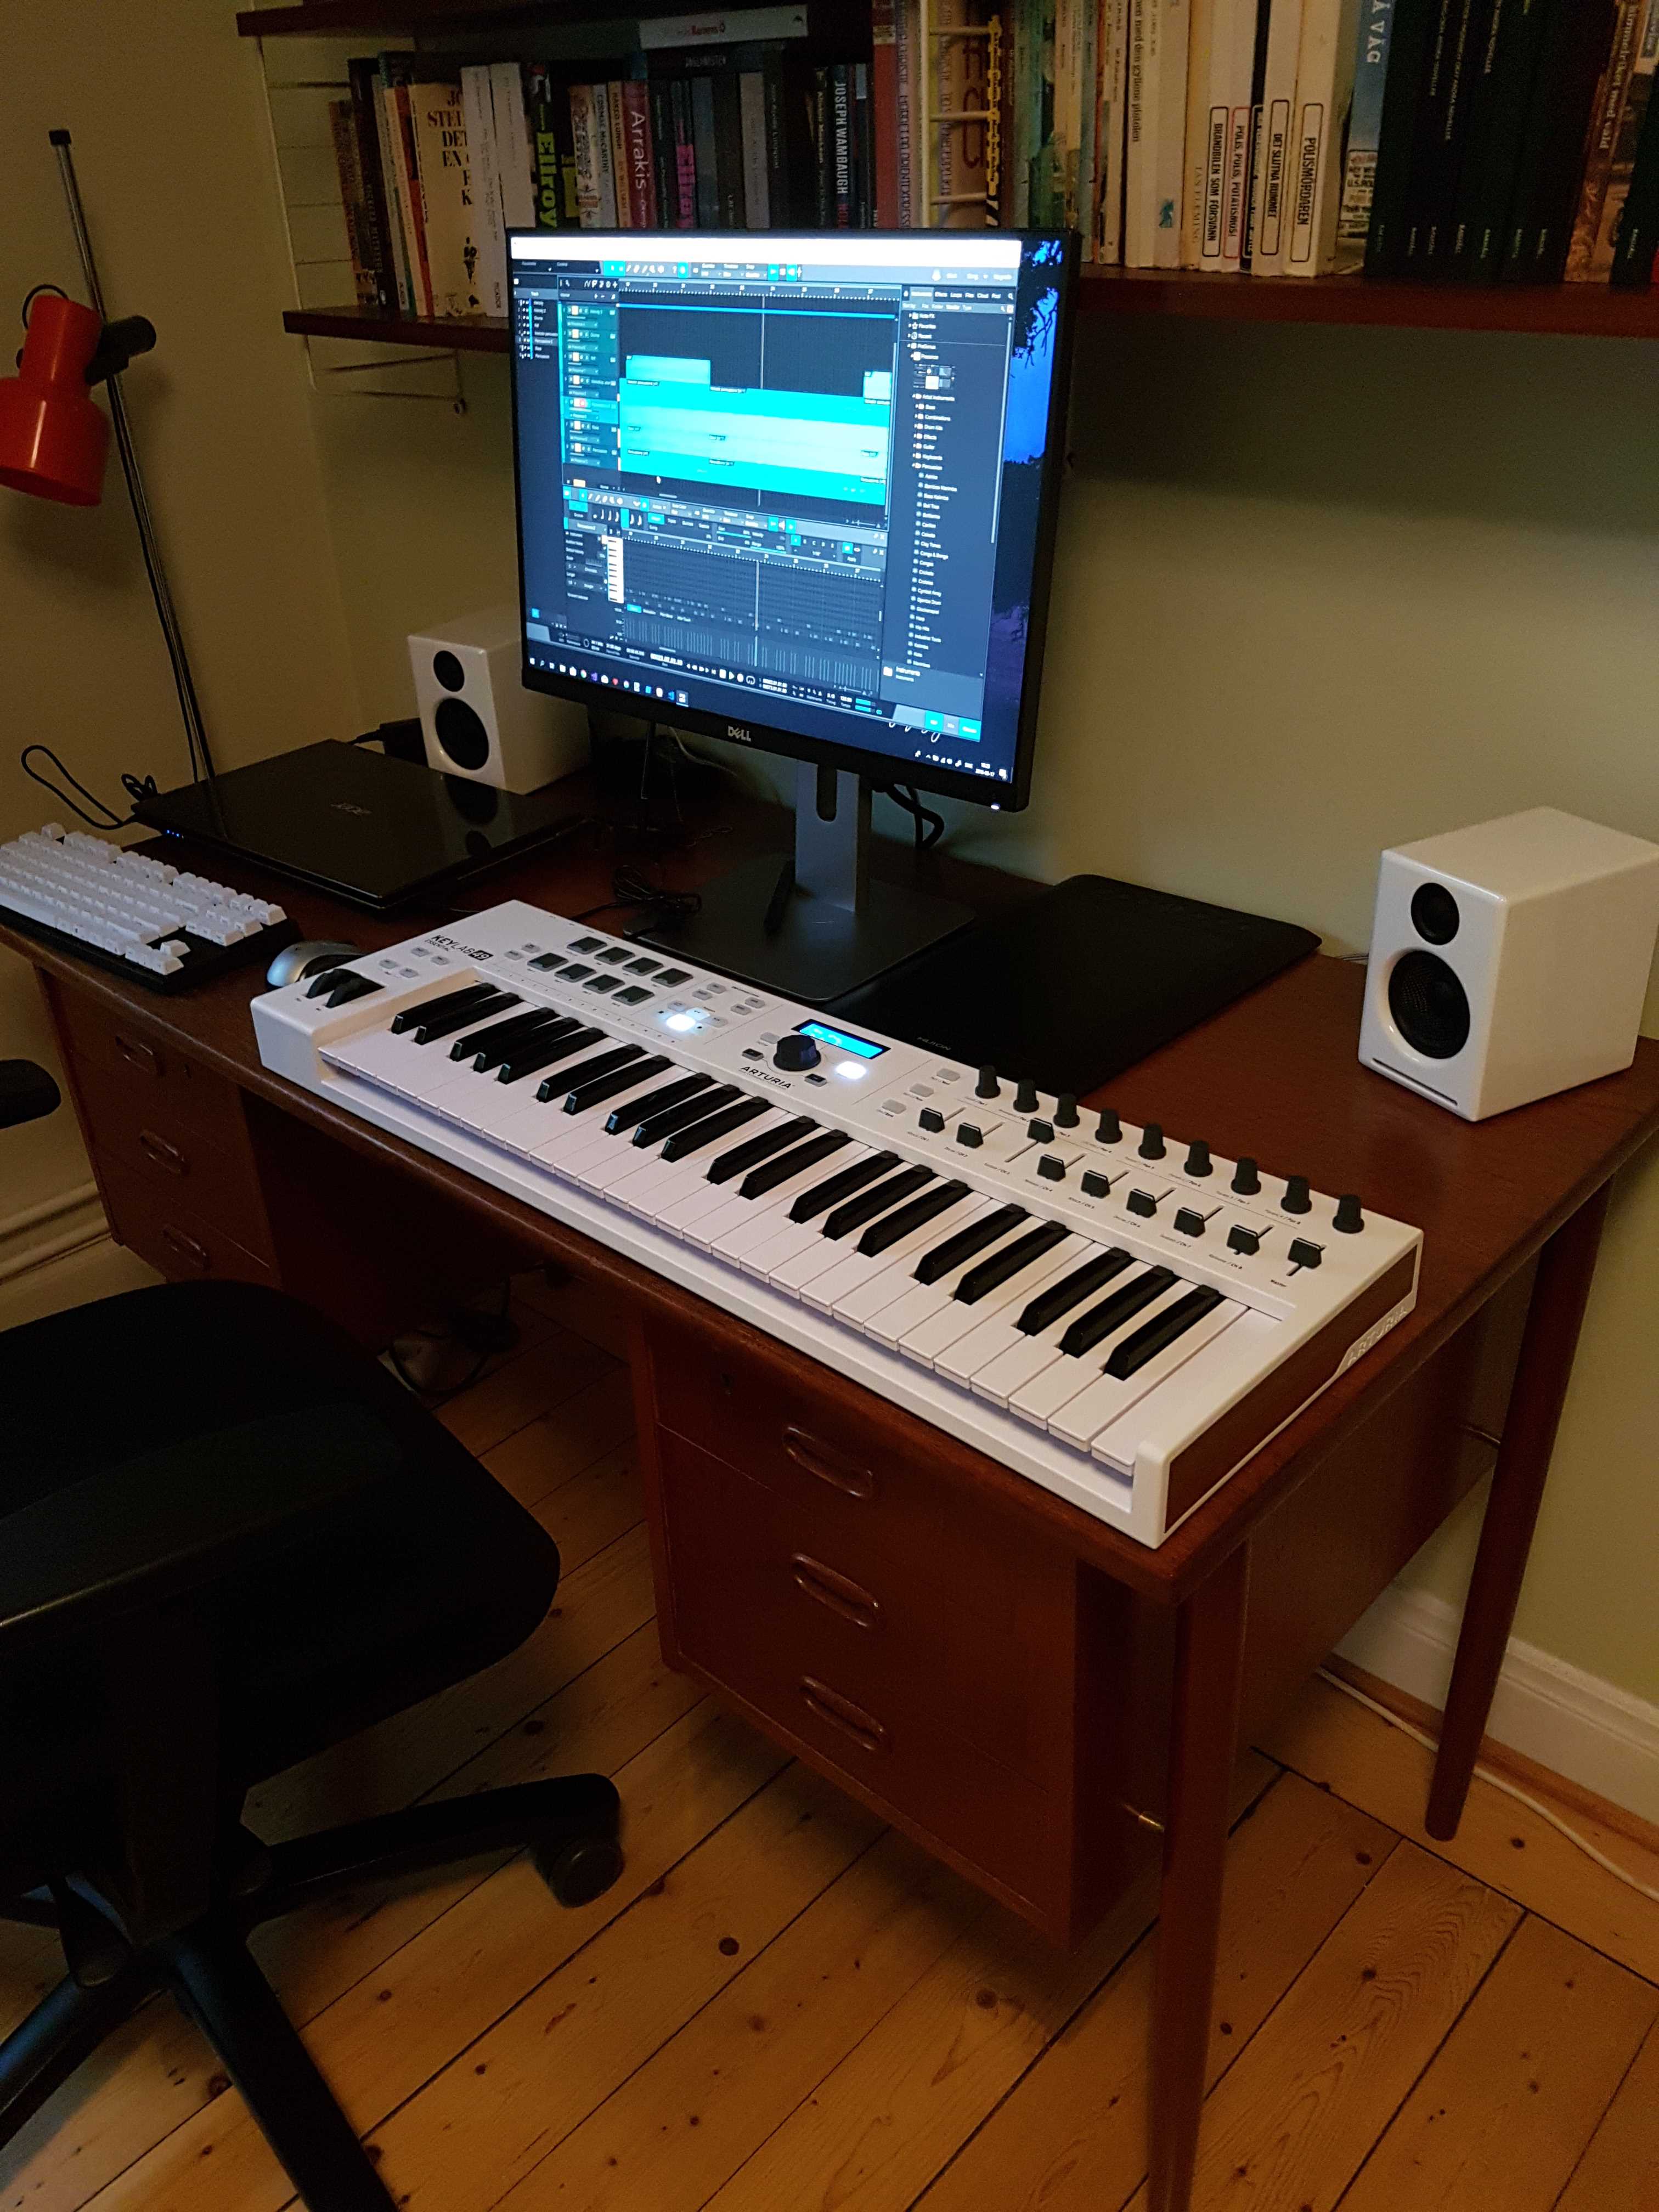
The keyboard is an Arturia KeyLab 49 and the speakers Audioengine A2+. Included with the keyboard was a DAW called Ableton Live. I don't know if this software is good or bad, I just know that I couldn't get my head around it. Instead, I've chosen to work with Studio One Prime, which is a free but limited version of Studio One, and has a user interface I feel comfortable working in.
SFX
To create a feeling of being inside an old samurai movie I'm going to use sounds from various movies as basis for the sound effects. So while waiting for the new keyboard to arrive I've spent a few summer evenings extracting sounds. It's amazing how much panting, grunting and screaming there are in those old movies. After a while I had to skip the speakers and use my headphones instead, if I hadn't I'm sure my neighbors would have thought I'd started some kind of torture dungeon and sent the police on me.
Something I hadn't thought of, but became apparent during this process was the fact that there is almost always a howling wind in the background of old Japanese action scenes. This of course made a lot of the sound useless.
Despite this unfortunate fact I now have quite an impressive collection of sounds including footsteps, screams, shouting, panting, growling, sword swooshes, sword clashes, and hits.
So far I've converted the sound effects to stereo, I've normalized them and cleaned them from as much noise as possible without distorting the sound I want to keep. For my first public developer build I consider them done, but before releasing a demo of the game I will process them further.
Music
When on vacation, visiting my father in my hometown of Boden, I borrowed his Yamaha keyboard and a few evenings later I had the main melody for the first game song ready. I call it “Ronin encounter” and this is the song that will be included in the first developer build.
I've not yet decided what style of music I want for the game. For a while I had my mind set on 8-bit music like the music made for the C64. It's a style of music that would sit well with the low-resolution retro graphics, but since I want the game to remind the player of old Japanese movies it might be better to use a musical style resembling the style found in those movies. Nothing is set in stone, but for now, I'll go with the latter.
The final product will include at least three different songs, one for the intro-screen, one for the highscore-screen and one or more for the gameplay. Sit back and enjoy a rough mix of the first gameplay song - "Ronin encounter":
To make the music match the quality of the sound effects and also enhance the feeling of an old movie I'll give the music an old vintage sound.
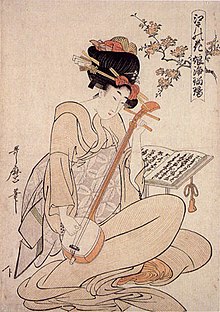
If you wonder what instrument the strange "plucking" sound comes from, it's called "Shamisen" and is a Japanese three-stringed traditional instrument not unlike the western banjo. Shamisen is featured in many samurai-movies and often played by a geisha and sometimes accompanied by a man singing in a dark voice.
That was all for this post, please let me know what you think about the effects and the music. Do you think it will work?
Happy coding!
/jan.
![]()
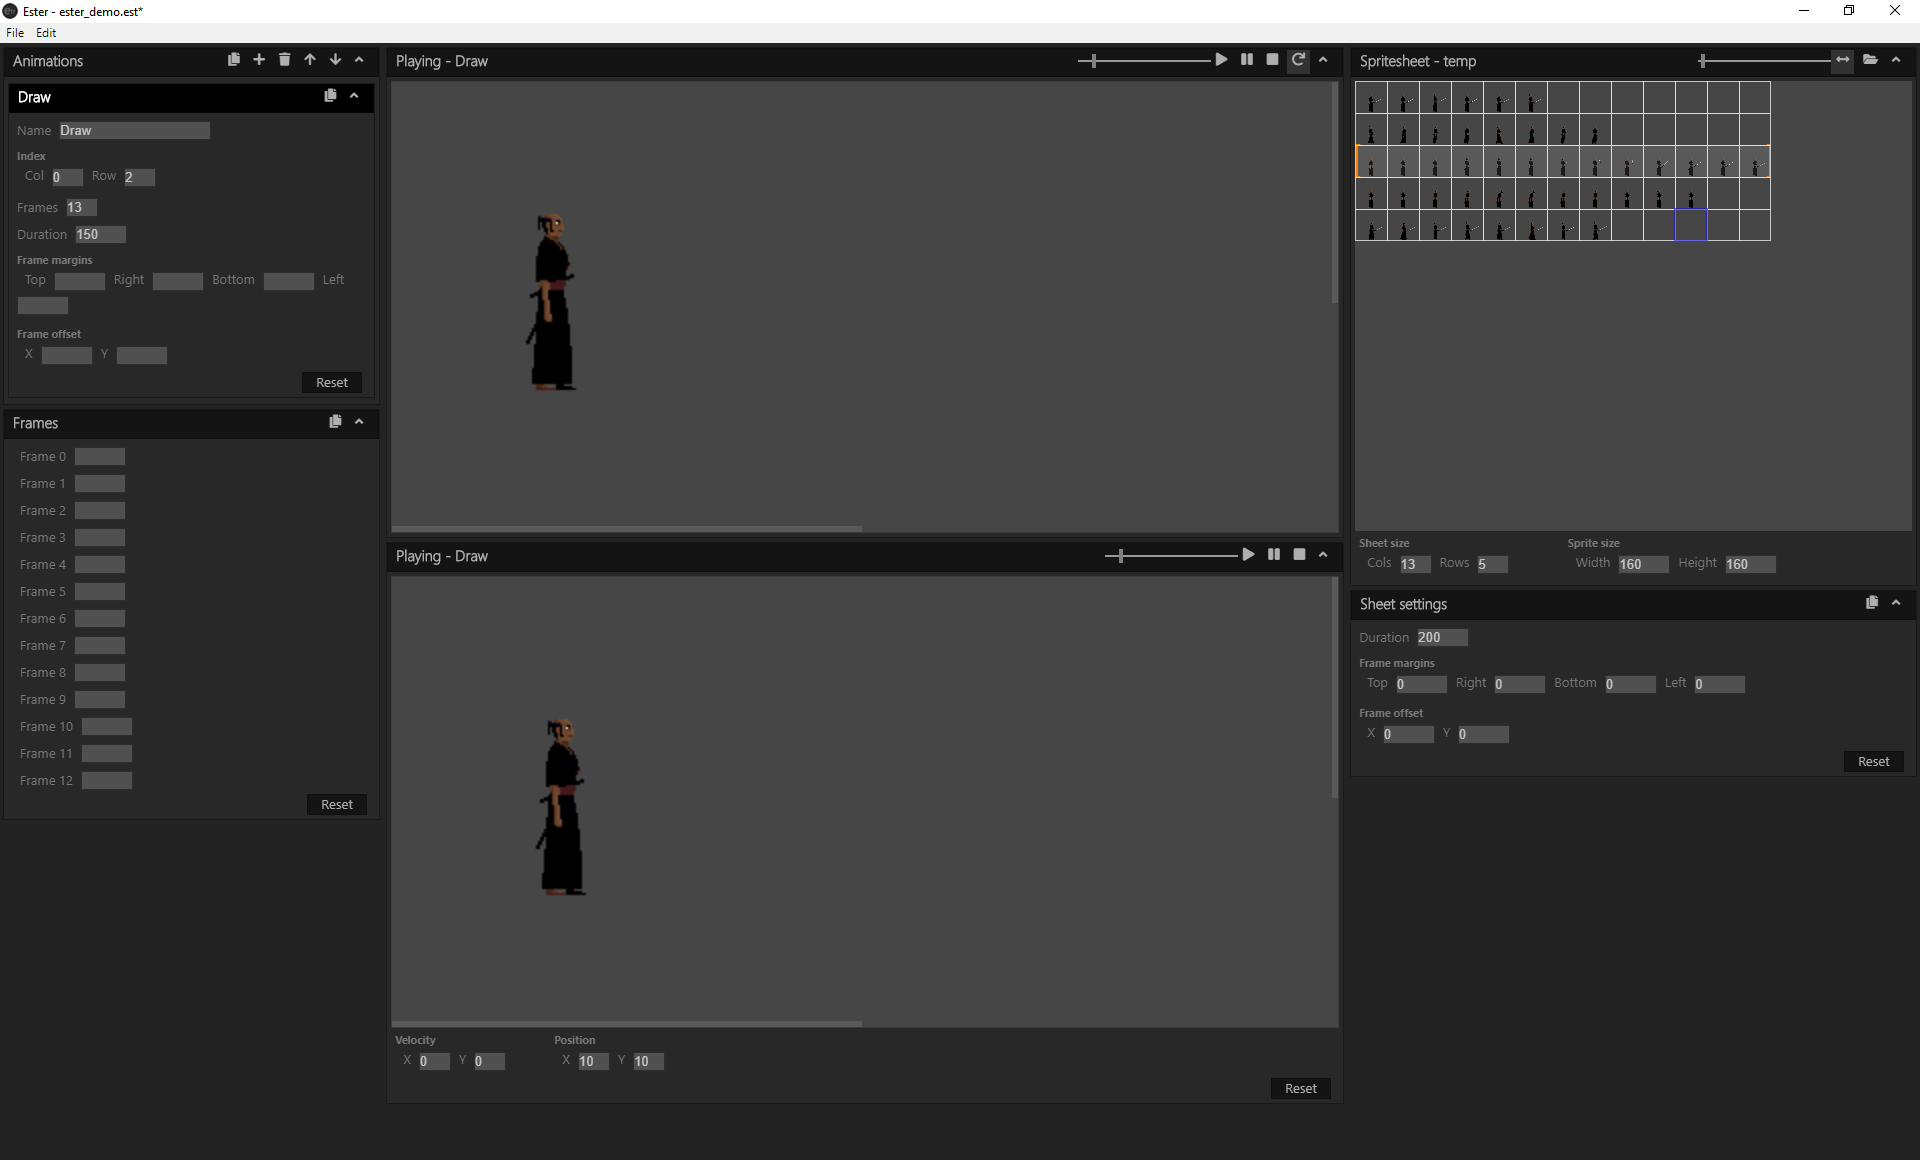
Ester (Eraserhead Animation Editor) is a new tool I've build that will make it easier for me to describe what different animations a spritesheet contains and their different characteristics e.g. how long each frame should be displayed. I can then export the description, as a json-file, and then together with the spritesheet load it into the game and use it to set up my "in game" animations.
This is how Ester looks with a spritesheet loaded and one animation created:
I'll easily admit that building this tool has been a detour that's taken far too much time from any actual game development, but please let me give you the background.
Background
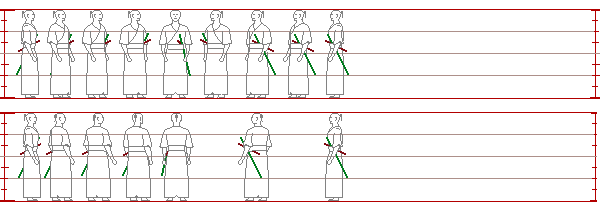
13 RONIN is a pixel-art game with animations based on spritesheets, just like the one below:
![]()
The spritesheet together with a json-file describing the sheet are read into the game and turned into different animations. A process that works quite well.
This is the "Draw"-animation beginning at row 3 and column 1 as described by the json-file below. In this example each frame is displayed for 150 milliseconds
Same animation as above but with individual frame times
The description file
The description file started out quite small, but since I prefer to hard-code as few things as possible and also want room for adjustment, the file grew.
This is a file describing the "Draw"-animation starting at row 3 and column 1:
	{
		// General description of the spritesheet
		"spritesheet": {

			// Size of sheet in columns and rows,
			// where each cell is a sprite
			"gridSize": {
				width: 13,	// The sheet has a size of 13 columns
				height: 5	// and 5 rows of sprites
			 }

			// Size of a sprite in pixels
			"spriteSize": {
				width: 160,		// Each sprite has a size
				height: 160		// of 160x160 pixels
			}
		}

		// Default values for animation frames
		"frameDefaults": {

			// Intended for describing hit-boxes and such. This
			// example would give a hitbox located at same position
			// as the sprite and of the same size
			"margin": {
				"top": 0,
				"right": 0,
				"bottom": 0,
				"left": 0
			},

			// Offset value used when positioning and drawing
			// sprites.
			"offset": {
				x: 10,	// The sprites should be drawn 10 pixels
				y: 0	// to the right of the destination point
			}

			// Frame duration. Display each frame 200 milliseconds
			// before advancing to next frame
			"duration": 200
		},

		// Animations found in the spritesheet
		"animations": [

			// An animation
			{
				// Name used for identification
				"name": "Draw",

				// OPTIONAL. Will override default setting
				"offset": {
					x: 0,	// No offset for this animation
					y: 0
				},

				// OPTIONAL. Will override default setting
				"margin": {
					"top": 0,
					"right": 0,
					"bottom": 0,
					"left": 0
				},

				// OPTIONAL. Will override default setting.
				// Frame duration for this animation is 150
				// milliseconds
				"duration": 150,

				// Start location in grid
				"index": {
					x: 0,	// This animation begins with image at
					y: 2	// row 3 and column 1
				},

				// This animation contains 13 frames starting
				// at "index"
				"frameCount": 13,

				// OPTIONAL. Using this property it's possible to
				// set frame duration for individual frames
				"frames": [
				]
			}
		]
	}
Writing and maintaining the description files is very tedious and it's also very easy to make mistakes. Remember that the file above only contains one animation and that is an animation without any individual frame duration times. To get the animation seen in the second example above following "frames"-section has to be added:
	"frames": [
		{
			"index": 0,
			"duration": 200
		},
		{
			"index": 1,
			"duration": 175
		},
		{
			"index": 2,
			"duration": 175
		},
		{
			"index": 3,
			"duration": 200
		},
		{
			"index": 4,
			"duration": 300
		},
		{
			"index": 5,
			"duration": 175
		},
		{
			"index": 10,
			"duration": 175
		},
		{
			"index": 11,
			"duration": 175
		},
		{
			"index": 12,
			"duration": 1000
		}
	]
Tech
Ester is an electron based application using React as UI-framework. I'm not really a front-end developer and since this isn't the main focus of the blog I wont dwell and deeper into the subject, but for any one interested in trying out these technologies, there are a lot of posts written on the subject, so just use your magic friend google and you'll get lucky.
And please feel free to browse or clone the Ester-repo. I think the project- and component-structure is quite good, but I'm sure there could be a lot of improvements made on the JavaScript- and CSS-code. If you find something really horrific please let me know.
Using Ester
If you would like to give Ester a try, please visit my BitBucket account for further instructions.
If you find Ester useful, run into bugs or have ideas for new features, please don't hesitate from letting me know.
Please be aware that this is not a finished product, but something I'm working on as part of the game development project. Fatal crashes might happen and breaking changes be introduced.
You're also very welcome to clone and extend the product yourself.
Please visit Eraserhead Studio for more on the project.
Happy coding!
/jan.
NOTE. As always, everything I show, share or write about here is work under progress and subject to change.
Here in Stockholm it's been unusually hot and dry for this season of the year and I'm quite convinced that the pharmacies have broken a new record in anti-histamine sales. Last night we were finally blessed with thunder and rain and today the air is cool and nice and the pollen gone.
I've sneezed quite a lot the last couple of weeks but I've also done some coding. My primary focus has been building an animation framework for use in intro, cutscenes and background movements and coding an editor for animating sprites. Ester (Eraserhead animation editor) will be the subject of an upcoming dev log and this dev log will be about the animation framework.

This is an animation demo and not part of the game
Animation framework
The purpose of the animation framework is to ease setting up and running sequences of multiple animations. The need for this arose with my desire to create an animated intro with objects moving in different patterns. But I will also use this framework for pre- and post-fight-animations as well as background animations.
When finished the animation framework will contain:
- Support for spritesheet-based animations
- Builders for setting up animations by code
- Simple script-language for setting up scenes
- Loader and parser for script-files
In addition to this, I will probably build an editor to use with the script-language for trying out and previewing animations.
The movie analogy
When designing and naming the building blocks of the framework I've taken a "movie scene"-approach and used a nomenclature found in movie scripts. That gave me following main classes:
- Scene
- Actor
- Action
- Animation
"Animation" might not be a name known from movie scripts, but I kept the name to encourage its use outside of the "animated scene" context. As long as you keep track of calling the update- and draw-methods both actors and animations can be used without a scene.
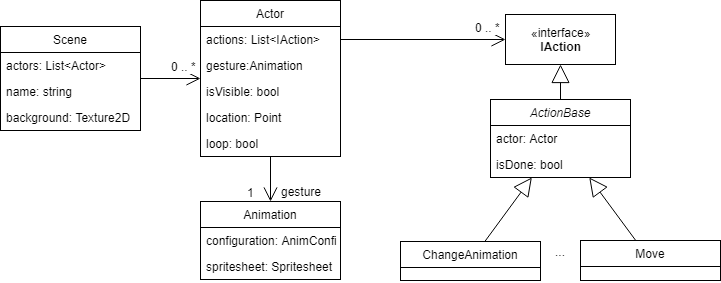
A simplified diagram describing the relationships between the classes
Scene
Think of a scene just the like a scene in a movie or a theater. It's a "room" where something takes place. A scene can have a name, background image and any number of actors. You draw it on the screen by calling its Draw-method.

Background for our demo
Actor
Unlike in a movie or theater, an actor is not only characters but all things living or dead that has it's own image and is separate from the background e.g. character, bullets flying, rising sun.
An actor has a location, it can be visible or hidden, and has a collection of actions to perform that can be looped when done. An actor also has an animation as it's current "gesture".
Action
Just like in the movies, an action is something an actor does, i.e. an actor will act according to its actions.
Some of the available actions are:
- Show - draw animation
- Hide - don't draw animation
- SetPosition - set position of actor
- BasicMove - move actor to destination with given velocity and acceleration
- ChangeGesture - change animation
Animation
An animation is based on a spritesheet, start index in the sheet and a frame count. This determines how the actor will appear on the screen.
A note on naming. The property for the animation is named Gesture in the Actor-class, that is a choice I made to keep the movie analogy consistent. I've named the class Animation to encourage use of it outside of the "animated scene"-context.
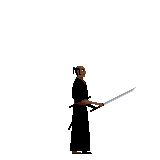
Our famous actor doing one of it's gestures
How to
To create the scene in the demo above following steps have to be made:
- Load content
- Create an animation sheet configuration
- Create an animation factory
- Create an actor
- Create the scene
- Start the scene
- Draw scene
Step 1 - 5 can all be done in the Initialize-method of the Game-class.
Step 1 - Load content
As a first step we load background- and spritesheet-images as textures.
var background = Content.Load("Animation_demo_background");
var texture = Content.Load("Animation_demo_spritesheet");
![]()
The demo spritesheet
Step 2 - Create animation sheet configuration
Then we create a configuration describing animations found in the spritesheet. This object will later be used as argument to our animation factory.
var sheetC
  .Begin()
  .Name("Samurai gestures")
  .GridSize(new Point(13, 4))
  .SpriteSize(new Point(160, 160))
  .DefaultFrameDuration(150)
  .AddAnimation("Idle", new Point(0, 0), 6)
  .AddAnimation("Bow", new Point(0, 3), 11)
  .AddAnimation("Draw", new Point(0, 2), 13)
  .AddAnimation("Walk wo sword", new Point(0, 1), 8)
  .AddAnimation("Walk w sword", new Point(0, 4), 8)
  .Build();
We create a configuration describing a spritesheet with a size of 13 columns and 4 rows where each sprite has a size of 160 x 160 pixels. The spritesheet is called "Samurai gestures" and default frame duration for all animations in this sheet is 150 milliseconds. It contains four different animations. Note that all names must be unique.
Step 3 - Create animation factory
When the sheet config is ready this step is easy. Call the AnimationFactory-constructor passing in the spritesheet texture and the sheet configuration. Our factory is ready.
var animFactory = new AnimationFactory(texture, sheetConf);
Step 4 - Create actor
Just as it takes some time for an actor to prepare for a big movie role, it takes some coding for us to set up the actor for our scene.
var actor =
  ActorBuilder
    .Begin(animFactory)
    .Actions(       acti
      {
        return
          actionBuilder
            .Hide()
            .SetPosition(new Point(-120, -4))
            .ChangeAnimation("Walk wo sword")
            .LoopAnimation()
            .Show()
            .Move(new Point(-60, -4), 0.1f, 0.0f)
            .ChangeAnimation("Bow")
            .WaitForAnimation()
            .ChangeAnimation("Walk wo sword")
            .LoopAnimation()
            .Move(new Point(110, -4), 0.1f, 0.0f)
            .ChangeAnimation("Draw")
            .WaitForAnimation()
            .ChangeAnimation("Idle")
            .WaitForAnimation()
            .ChangeAnimation("Walk w sword")
            .LoopAnimation()
            .Move(new Point(312, -4), 0.1f, 0.0f)
            .Build();
      })
    .Build();

actor.Loop = true;
Here we use the ActorBuilder in combination with the ActionBuilder to create the actor and the collection of actions to perform. All these actions will be performed in sequence and when done the actions will, thanks to the "actor.Loop = true;" statement, be restarted.
Step 5 - Create scene
As a last building step we tie everything together by creating our scene, and for this, we also have a dedicated builder.
_scene =
  SceneBuilder
    .CreateScene(animFactory)
    .Name("Demo")
    .Background(background)
    .AddActor(actor)
    .Build();
Our scene is now ready.
Step 6 - Start scene
If you run the project you'll find that nothing happens. That's because we haven't included the scene in the game loop yet.
Add following lines to the Update-method:
if (_scene.State == State.NotStarted)
 _scene.Start();
_scene.Update(gameTime);
Step 7 - Draw scene
Still, nothing happens. It's because we're still not drawing the scene. And following line to the Draw-method:
_scene.Draw(_spriteBatch, Vector2.Zero);
Run the project and enjoy!
The future
You're as always more than welcome to download the code and use it in any way you like, but since it's still early days please regard it more as inspiration than a working framework. I'm sure there are lots of bugs. And changes will come.
If not discouraged, visit my BitBucket-account and get going, or wait for an announcement of a more stable version.
Please visit Eraserhead Studio for more.
Happy coding!
/jan.
![]()
NOTE. As always, everything I publish here or on any other site is work in progress and subject to change.
DevLog #2 - Lightning
Ok, It hasn't been a full month since my first post here, but I still think it's time for an update, and from now on I plan to post a major news article at the beginning of every month containing a summary of what I've been up to lately. For anyone interested in more I recommend my blog at Eraserhead Studio where you can find random news, animations, images, sound and code that hopefully can help you out in your own game project.
So, what have I been up to lately?
Well, due to an aching hand, the result of too much asset drawing, I've let my hand rest from the tablet and instead focused on doing some proper coding. The result is two quite flexible engines: one for rain and the other one for lightning.
Rain
Since a few of the levels will take place in bad weather it's important for me to be able to generate some good looking rain. I talked about my rain engine already in the last post but since then I've fixed a few bugs, added some properties and posted a higher quality demonstration video on YouTube.
The engine has a lot of settings, all which will help me make a living and varied rain. Some of these are:
- Drop velocity
- Drop acceleration
- Density
- Drop creation interval
- Wind
- No of splashes at ground contact
There are still some minor features to add, such as individual ground height at different z-level, but majority of the engine is now done.
If you want to do something similar for you own project please check out the demonstration video:
And why not download the source code from BitBucket.
Lightning
For an even more dramatic effect I want thunder and lightning in the game. I started doing a lightning bolt, then a lightning branch and finally a lightning engine sending randomized bolts and branches through the sky.
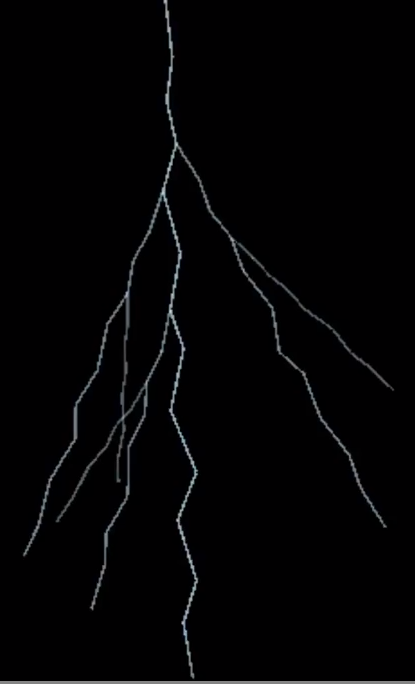
As with the rain engine this engine also has a lot of settings, some of these are:
- Lightning length
- Lightning angle
- Interval between lightning strikes
- Lightning duration
- Animation
- Fade
This was quite fun to code and I'm quite pleased with the result. Things left to add is sound for thunder and maybe a flashing background.
Check out the demonstration video:
And get the source code from BitBucket.
A big thank you to Michael Hoffman whose awesome article was a big inspiration in this work. Other inspirations have been google images and YouTube. Just search for "best lightning strike" and enjoy :-)
Shaders
Working with the lightning I spent a few hours and reading up on HLSL and including shaders in MonoGame. It was interesting and fun, but also quite time consuming. There will be a number of shaders included in the end product, but for now it will be a type of coding I will save for the polishing phase.
For anyone getting started with MonoGame and HSLS I highly recommend the article My First Pixel Shader(s).
I'd be very happy for recommendations on other good HSLS pages.
Home page
I'm using WIX for the Eraserhead Studio page but unfortunately the WIX-editor is both slow and buggy. I've spent a number of hours in the editor trying to achieve a nicer looking and easier to use site than the previous one but WIX doesn't make it easy. I've still got two active tickets at the WIX-support regarding bugs I can't find any solutions for, but hopefully the site will still be better than the last one. The short lesson being - don't use WIX.
Dev forums
![]()
Besides writing and publishing this post I've also drawn avatar, logo and banner and added those to my profiles on:
When I've got a finished demo I'll also get on Facebook and Twitter. Do you have recommendations on other sites where you think I belong? Please let me know.
Please visit Eraserhead Studio for more.
Happy coding!
/jan.
![]()
NOTE. As always, everything I publish here or on any other site is work in progress and subject to change.
13 RONIN is a 2D pixel art samurai sword fighting game inspired by old Japanese samurai movies and 8-bit classics such as Barbarian and The Way Of The Exploding Fist. Your mission as a noble samurai is to defeat 13 renegade ronin and their murderous leader. Although done in low resolution pixel art the game will have a somewhat “arty” aesthetic in black and white mixed with details in color.

Who am I?
I’m a forty year old Swede with about 17 years of professional experience working as a .Net developer. To make a game has been a dream ever since I as a child learned to write a “guess a number”-game on my Commodore 64. Now I’m trying to fulfill that dream.
I’m the sole developer behind this project and I’m doing it as a spare time project so please be patient.
Status
The main structure of the game and basic gameplay, based on placeholder graphics, is done and I’m currently switching between drawing assets and coding graphics effects like rain and lightning.
News
I’m quite often updating my dev blog with short posts about the progress I make. A post can contain a new animation, a sound effect, a code sample or something else related to the making of 13 RONIN. On this and other forums I will post updates, that are longer than those on my site, but not as often.
To help and inspire the community I will share tools and parts of the code on my BitBucket-page.
Goals
My current goal is to get a demo finished and released. The demo will only contain 1 or maybe 2 different opponents but otherwise be a fully playable game. This version will be absolutely free.
The full game will contain 13 levels, all with different enemies, backgrounds and background animations. This version will be priced as other games of similar scope.
Currently I’m aiming for a PC release but other platforms might follow.
Happy coding!
/jan.
Profile